

Overview
This page shows platform administrators how to deploy and manage W&B Server on Kubernetes (cloud or on-premises) using the W&B Kubernetes Operator. By the end, you have a running W&B Server installation that the operator manages and upgrades automatically. Use this guide if you self-manage a W&B deployment and need an installation method that works across cloud, on-premises, and air-gapped environments. The W&B Kubernetes Operator is the recommended way to deploy W&B Server on Kubernetes (cloud or on-premises). For an overview of the operator, why W&B uses it, and how configuration hierarchy works, see Self-Managed.Before you begin
Before deploying W&B with the Kubernetes Operator, ensure your infrastructure meets all requirements:- Review infrastructure requirements: See the Self-Managed infrastructure requirements page for details on:
- Software version requirements (Kubernetes, MySQL, Redis, Helm, ClickHouse)
- Hardware requirements (CPU architecture, sizing recommendations)
- Kubernetes cluster configuration
- Networking, SSL/TLS, and DNS requirements
- Obtain a W&B Server license: See the License section on the Requirements page.
- Provision external services: Set up MySQL, Redis, and object storage before deployment.
MySQL database
W&B requires an external MySQL database. For production, W&B recommends using managed database services: Managed database services provide automated backups, monitoring, high availability, patching, and reduce operational overhead. See the reference architecture for MySQL requirements, including sizing recommendations and configuration parameters. For the SQL to create the database, see the bare-metal guide. For questions about your deployment’s database configuration, contact support or your AISE. For complete MySQL setup instructions including configuration parameters and database creation, see the MySQL section in the requirements page. If you are upgrading from MySQL 8.0.x, see Upgrade MySQL to 8.4.x.Redis
W&B depends on a single-node Redis 7.x deployment, which W&B’s components use for job queuing and data caching. For testing and proof-of-concept work, W&B Self-Managed includes a local Redis deployment. This bundled deployment isn’t appropriate for production use. For production deployments, W&B can connect to a Redis instance in the following environments:- Amazon ElastiCache
- Google Cloud Memorystore
- Azure Cache for Redis
- Self-hosted Redis in your cloud or on-premises infrastructure
Object storage
W&B requires object storage with pre-signed URL and CORS support. W&B recommends the following storage providers:- Amazon S3: Object storage service offering scalability, data availability, security, and performance.
- Google Cloud Storage: Managed service for storing unstructured data at scale.
- Azure Blob Storage: Cloud-based object storage for unstructured data at scale.
- CoreWeave AI Object Storage: S3-compatible object storage optimized for AI workloads.
- Enterprise S3-compatible storage such as MinIO Enterprise (AIStor), NetApp StorageGRID, or other enterprise solutions.
MinIO Open Source is in maintenance mode with no active development or pre-compiled binaries. For production deployments, W&B recommends managed object storage services or enterprise S3-compatible solutions such as MinIO Enterprise (AIStor).
Provision your storage bucket
Before configuring W&B, you must provision your object storage bucket with the required IAM policies, CORS configuration, and access credentials. See the Bring Your Own Bucket (BYOB) guide for detailed step-by-step provisioning instructions for:- Amazon S3 (including IAM policies and bucket policies)
- Google Cloud Storage (including PubSub notifications)
- Azure Blob Storage (including managed identities)
- CoreWeave AI Object Storage
- S3-compatible storage (MinIO Enterprise, NetApp StorageGRID, and other enterprise solutions)
OpenShift Kubernetes clusters
W&B supports deployment on OpenShift Kubernetes clusters in cloud, on-premises, and air-gapped environments.W&B recommends you install with the official W&B Helm chart.
Run the container as an un-privileged user
OpenShift and similar orchestrators often reject containers that run as root, so W&B containers must be configured to run as a non-root user that still belongs to the root group. By default, containers use a$UID of 999. Specify $UID >= 100000 and a $GID of 0 if your orchestrator requires the container run with a non-root user.
W&B must start as the root group (
$GID=0) for file system permissions to function properly.app or console. For details, see Custom security context.
Deploy W&B Server application
The W&B Kubernetes Operator with Helm is the recommended installation method for all W&B self-managed deployments, including cloud, on-premises, and air-gapped environments.
- Helm CLI
- Terraform
W&B provides a Helm chart to deploy the W&B Kubernetes Operator to a Kubernetes cluster. This approach lets you deploy W&B Server with Helm CLI or a continuous delivery tool like ArgoCD.For deployment-specific considerations, see Environment-specific considerations and Deploy with Terraform on public cloud. For disconnected environments, see Deploy on Air-Gapped Kubernetes.Follow these steps to install the W&B Kubernetes Operator with Helm CLI:
-
Add the W&B Helm repository. The W&B Helm chart is available in the W&B Helm repository:
-
Install the Operator on a Kubernetes cluster:
-
Configure the W&B operator custom resource to trigger the W&B Server installation. Create a file named
operator.yamlwith your W&B deployment configuration. Refer to Configuration Reference for all available options. Here’s a minimal example configuration: -
Start the Operator with your custom configuration so that it can install, configure, and manage the W&B Server application:
Wait until the deployment completes. This takes a few minutes.
- To verify the installation using the web UI, create the first admin user account, then follow the verification steps outlined in Verify the installation.
wandb-cr namespace and a W&B Server application that the operator manages from your operator.yaml custom resource.Verify the installation
To verify the installation, W&B recommends using the W&B CLI. Thewandb verify command runs tests that confirm components and configurations work as expected.
This procedure assumes that you create the first admin user account in a browser.
-
Install the W&B CLI:
-
Log in to W&B:
For example:
-
Verify the installation:
Enable the MCP server
The W&B MCP Server ships as an optional subchart inoperator-wandb. When enabled, the operator deploys an in-cluster MCP server exposed through your existing ingress at <global.host>/mcp, so any MCP-compatible client can connect using a W&B API key. This is the same server W&B runs as the hosted offering at https://mcp.withwandb.com/mcp, but pointed at your deployment’s data.
For end-user client configuration and the tool catalog, see Use the W&B MCP server. This section only covers the operator-side enablement.
Prerequisites
Make sure your deployment meets the following requirements before you enable the MCP server:- Chart version:
operator-wandb0.42.3or later. Themcp-serversubchart was introduced in0.42.1, but the Datadog and privacy fields used in the following example were added later. - Weave Traces enabled: the MCP server depends on Weave Traces for trace tools and for the
WF_TRACE_SERVER_URLdefault. Setweave-trace.install: true. If Weave Traces isn’t enabled, the Helm render fails withmcp-server requires weave-trace.install=true. - Reachable ingress:
global.hostmust already resolve and route to the W&B ingress. The MCP pod readsWANDB_BASE_URLfromglobal.hostand is available at<global.host>/mcp. - Node capacity: the MCP pod requests
500mCPU and1Gimemory by default (limits2CPU and4Gimemory). Confirm your node pool has enough headroom before you enable the subchart.
Enable the subchart
Enable themcp-server subchart so that the operator deploys an in-cluster MCP server and extends your existing W&B ingress with a /mcp route. Add the following to the spec.values block of your existing WeightsAndBiases custom resource (CR), alongside your existing global, ingress, and other overrides. The Datadog block is optional, but recommended when a Datadog Agent DaemonSet already collects pod logs and traces in your cluster.
weave-trace.install: true: required unless you setmcp-server.env.WF_TRACE_SERVER_URLyourself.datadog.mode: "agent": use for Kubernetes deployments where the Datadog Agent DaemonSet owns log and trace collection. In agent mode, the MCP pod doesn’t need a Datadog API key.datadog.service,env,deploymentType,customer,extraTags: set these to match your deployment’s observability naming conventions. Setcustomerto an empty string if you don’t want a customer tag.privacy.logLevel: use"standard"for most self-managed Kubernetes installations. This redacts free-text parameter values in logs while preserving deployment identifiers that operators commonly use for debugging. Use"strict"when entity, project, run, or user identifiers should not remain in plaintext logs. Use"off"only when you explicitly want plaintext logging for those values.
wandb-mcp-server deployment and service in the release namespace, and extends the W&B ingress with a /mcp path.
Verify the MCP server
Wait for the pod to becomeRunning, then check the health endpoint in-cluster and through the ingress:
200 OK. The in-cluster check confirms the pod is healthy. The ingress check confirms routing. If the in-cluster check returns 200 OK but the ingress check returns 404 Not Found, see Troubleshooting. If you enabled Datadog, MCP server logs should also appear in Datadog with the configured mcp-server.datadog.service and mcp-server.datadog.env values.
Connect a client
After the MCP server is healthy, configure your MCP client to usehttps://<HOST_URI>/mcp with a W&B API key as the bearer token. For IDE and agent configurations, see Use the W&B MCP server.
Troubleshooting
| Symptom | Cause and fix |
|---|---|
helm render fails with mcp-server requires weave-trace.install=true | Add weave-trace.install: true to spec.values. The MCP server depends on Weave Traces for trace tools. |
wandb-mcp-server pod stuck in Pending with Insufficient cpu or Insufficient memory | Add node capacity, or lower mcp-server.resources.requests in your CR. Defaults are 500m CPU and 1Gi memory. |
curl https://<HOST_URI>/mcp/health returns 404 | The chart renders the /mcp ingress path only when mcp-server.install: true. Reapply the CR and wait for the ingress controller to propagate the new path. |
| MCP logs don’t appear in Datadog | Confirm mcp-server.datadog.enabled: true, mcp-server.datadog.mode: "agent", and that the Datadog Agent DaemonSet collects pod stdout. Search Datadog with the configured service and env values. |
| MCP logs include more user-supplied text than expected | Set mcp-server.privacy.logLevel to "standard" or "strict". Use "strict" when identifiers such as entity, project, run, or user names should not remain in plaintext logs. |
wandb-mcp-server pod in ImagePullBackOff in an air-gapped or mirrored cluster | Mirror the image to your registry and override mcp-server.image.repository in your CR, the same pattern used for other W&B component images in air-gapped installs. See Deploy on Air-Gapped Kubernetes. |
Environment-specific considerations
Kubernetes is the same whether it runs on-premises or in the cloud. The main differences are in naming and managed services (for example, MySQL compared to RDS, or S3 compared to on-premises object storage). This section covers considerations that vary by environment.On-premises and bare metal
When deploying to on-premises or bare-metal Kubernetes, pay attention to the following.Load balancer configuration
On-premises Kubernetes clusters typically require manual load balancer configuration. Options include:- External load balancer: Configure an existing hardware or software load balancer, such as F5 or HAProxy.
- Nginx Ingress Controller: Deploy nginx-ingress-controller with NodePort or host networking.
- MetalLB: For bare-metal Kubernetes clusters, MetalLB provides load balancer services.
Persistent storage
Ensure your Kubernetes cluster has a StorageClass configured for persistent volumes. W&B components might require persistent storage for caching and temporary data. Common on-premises storage options include:- NFS-based storage classes
- Ceph/Rook storage
- Local persistent volumes
- Enterprise storage solutions such as NetApp or Pure Storage
DNS and certificate management
For on-premises deployments, complete the following tasks:- Configure internal DNS records to point to your W&B hostname.
- Provision SSL/TLS certificates from your internal Certificate Authority (CA).
- If using self-signed certificates, configure the operator to trust your CA certificate.
OpenShift deployments
W&B fully supports deployment on OpenShift Kubernetes clusters. OpenShift deployments require additional security context configurations due to OpenShift’s stricter security policies. For OpenShift-specific configuration details, see OpenShift Kubernetes clusters. For OpenShift examples in air-gapped environments, see Deploy on Air-Gapped Kubernetes.Object storage for on-premises and S3-compatible
After provisioning your object storage bucket (see Object storage provisioning), configure it in your W&B Custom Resource. AWS S3 (on-premises) For on-premises AWS S3 (through Outposts or compatible storage):?tls=true to the bucket path:
- Storage capacity and performance: Monitor disk capacity carefully. Average W&B usage results in tens to hundreds of gigabytes. Heavy usage can result in petabytes of storage consumption.
- Fault tolerance: At minimum, use RAID arrays for physical disks. For S3-compatible storage, use distributed or highly available configurations.
- Availability: Configure monitoring to ensure the storage remains available.
- Amazon S3 on Outposts
- NetApp StorageGRID
- MinIO Enterprise (AIStor)
- Dell ObjectScale
Public cloud with Terraform
For full infrastructure-plus-application deployment on AWS, Google Cloud, or Azure, see Deploy with Terraform on public cloud.Deploy with Terraform on public cloud
W&B recommends fully managed deployment options such as W&B Multi-tenant Cloud or W&B Dedicated Cloud deployment types. Fully managed services require little or no configuration.
- AWS
- Google Cloud
- Azure
W&B recommends using the W&B Server AWS Terraform Module to deploy the platform on AWS.The Terraform Module deploys the following mandatory components:
- Load Balancer
- AWS Identity & Access Management (IAM)
- AWS Key Management System (KMS)
- Amazon Aurora MySQL
- Amazon VPC
- Amazon S3
- Amazon Route53
- Amazon Certificate Manager (ACM)
- Amazon Elastic Load Balancing (ALB)
- Amazon Secrets Manager
- Elastic Cache for Redis
- SQS
Prerequisite permissions
The account that runs Terraform must be able to create all components listed in the preceding section and have permission to create IAM Policies and IAM Roles and assign roles to resources.General steps
The steps in this section are common for any deployment option.-
Prepare the development environment.
- Install Terraform
- W&B recommends creating a Git repository for version control.
-
Create the
terraform.tfvarsfile. Customize thetvfarsfile content according to the installation type. The minimum recommended content looks like the following example.Define variables in yourtvfarsfile before you deploy because thenamespacevariable is a string that prefixes all resources created by Terraform. The combination ofsubdomainanddomainforms the FQDN for your W&B instance. In the preceding example, the W&B FQDN iswandb-aws.wandb.mland the DNSzone_idis where Terraform creates the FQDN record. Bothallowed_inbound_cidrandallowed_inbound_ipv6_cidralso require setting. In the module, this is a mandatory input. The following example permits access from any source to the W&B installation. -
Create the file
versions.tf. This file contains the Terraform and Terraform provider versions required to deploy W&B in AWS:Refer to the Terraform Official Documentation to configure the AWS provider. W&B recommends that you also add the remote backend configuration mentioned at the beginning of this documentation. -
Create the file
variables.tfFor every option configured in theterraform.tfvarsTerraform requires a correspondent variable declaration.
Recommended deployment
This is the most straightforward deployment option configuration that creates all mandatory components and installs in the Kubernetes Cluster the latest version of W&B.-
Create the
main.tfIn the same directory where you created the files in the General Steps, create a filemain.tfwith the following content: -
Deploy W&B
To deploy W&B, execute the following commands:
Enable Redis
To use Redis to cache SQL queries and speed up the application response when loading metrics, add the optioncreate_elasticache_subnet = true to the main.tf file:Enable message broker (queue)
To enable an external message broker using SQS, add the optionuse_internal_queue = false to the main.tf file:This is optional because W&B includes an embedded broker. This option doesn’t bring a performance improvement.
Additional resources
Other deployment options
You can combine multiple deployment options by adding all configurations to the same file. Each Terraform module provides several options that can be combined with the standard options and the minimal configuration found in the recommended deployment section. Refer to the module documentation for your cloud provider for the full list of available options:Access the W&B management console
The W&B Kubernetes Operator comes with a management console where you can review deployment status, view component metrics, and adjust operator-level settings. It’s available at${HOST_URI}/console, for example https://wandb.company-name.com/console.
You can log in to the management console in two ways:
- Option 1 (Recommended)
- Option 2
-
Open the W&B application in the browser and log in. Log in to the W&B application with
${HOST_URI}/, for examplehttps://wandb.company-name.com/ -
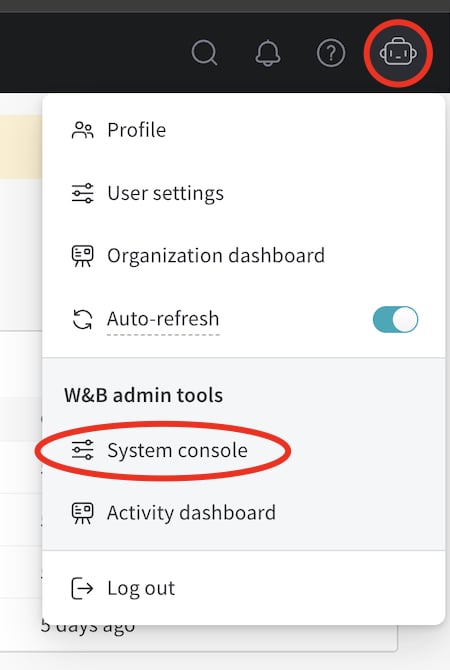
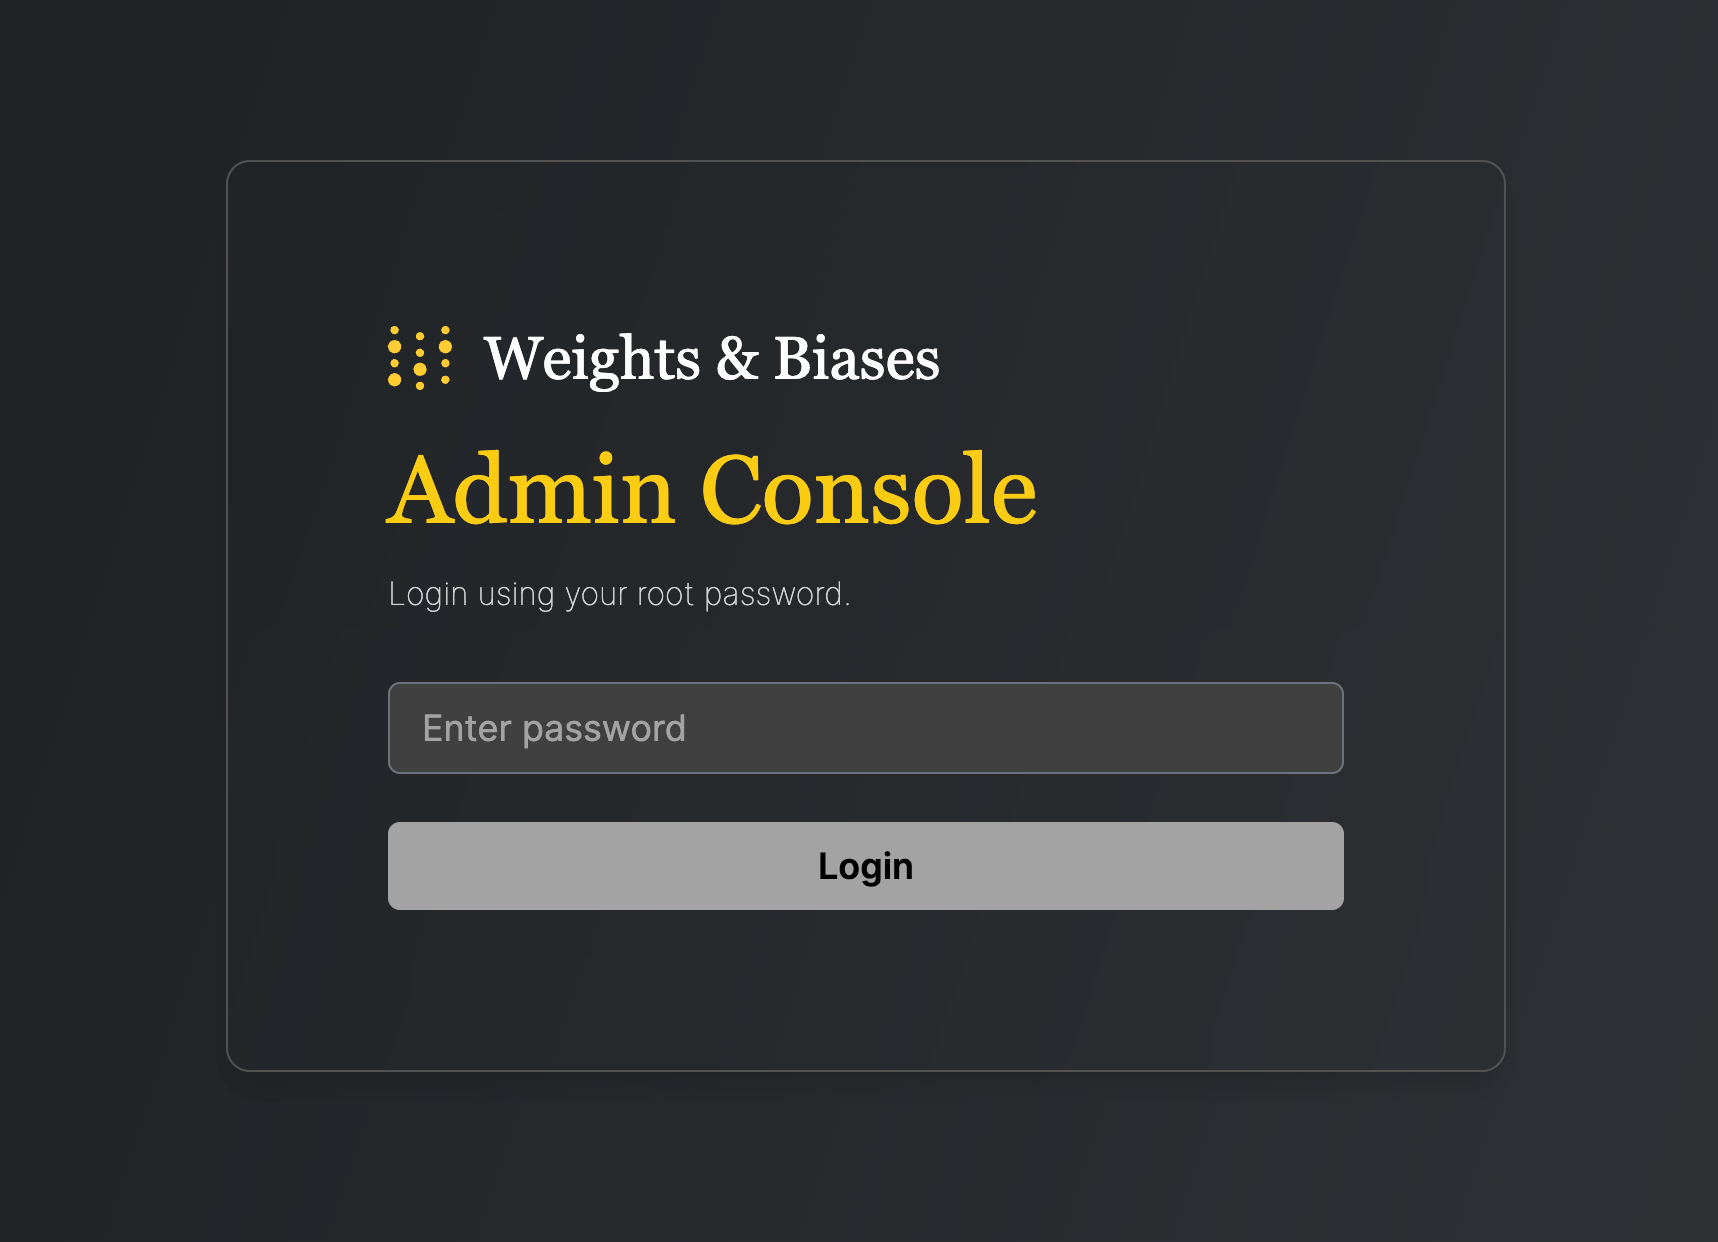
Access the console. Click the icon in the top right corner and then click System console. Only users with admin privileges can see the System console entry.
Update the W&B Kubernetes Operator
This section describes how to update the W&B Kubernetes Operator itself. Update the operator periodically so that you get bug fixes and new reconciliation features.- Updating the W&B Kubernetes Operator doesn’t update the W&B Server application.
- If you use a Helm chart that doesn’t use the W&B Kubernetes Operator, see the migration instructions before following the steps in this section to update the W&B Operator.
-
Update the repo with
helm repo update: -
Update the Helm chart with
helm upgrade:
Update the W&B Server application
You no longer need to update W&B Server application if you use the W&B Kubernetes Operator. The operator automatically updates your W&B Server application when a new version of the software of W&B is released.Upgrade MySQL to 8.4.x
MySQL 8.0.x is end of life. Self-Managed deployments must run a supported MySQL version that receives security patches and critical bug fixes. If you run community MySQL, install or upgrade to MySQL 8.4.x. If you use a managed service, run an engine version your provider documents as supported and patched (for example Amazon RDS for MySQL, Google Cloud SQL for MySQL, or Azure Database for MySQL). W&B has validated the platform against MySQL 8.4.0 and current 8.4.x releases. These steps describe the sequence from W&B’s perspective. For how to upgrade MySQL itself, including backups and version paths, follow your MySQL distribution’s or cloud provider’s documentation. The same sequence applies to standard and air-gapped Operator deployments. In air-gapped environments, obtain MySQL 8.4.x software through your internal distribution process before you upgrade the database.Plan a maintenance window and notify users before you begin. Contact Customer Support or your W&B team if you have questions about compatibility or your deployment topology.
- Review MySQL release notes and documentation for your target version and any intervening versions for requirements and other details.
- Prepare for maintenance. Before you start the upgrade, you can run the MySQL Shell upgrade checker against your database to surface and fix compatibility issues for your target version. Resolve any errors or warnings in the checker output before you proceed. Refer to the documentation for your MySQL distribution.
- Shut down MySQL and take a full backup of your MySQL database according to your MySQL distribution’s documentation. MySQL will be unavailable during the upgrade. While the database is unavailable, W&B client applications can’t connect and will experience temporary errors.
- Upgrade MySQL to 8.4.x according to your MySQL distribution’s documentation.
- Restart MySQL and verify that it is operational.
-
When MySQL is up, run
wandb verifyto validate your W&B deployment. The command runs a series of checks and reports results toSTDOUT. If it reports problems, make adjustments and run it again. For setup and login steps, see Verify the installation. - After validation completes, users can resume normal operations.
ClickHouse compatibility for upgrades
Self-Managed deployments that use an external ClickHouse cluster must verify ClickHouse compatibility before upgrading W&B Server.Unsupported ClickHouse versions
W&B Self-Managed deployments using W&B Weave or Models OLAP features require a supported version of both ClickHouse Server and ClickHouse Keeper.- Weave does not work with ClickHouse 26.1 or 26.2.
- The Models OLAP features described in the next section require ClickHouse 26.2+.
- Deployments using both Weave and Models OLAP features require ClickHouse 26.3.
Models OLAP features
W&B Server 0.81.0+ introduces schema migrations that require ClickHouse 26.2+. These migrations run when any of the following Models OLAP features are enabled in your Helm values:- Set these to
falsein your Helm values, or: - Upgrade both ClickHouse Server and ClickHouse Keeper to 26.2 or newer (26.3 or newer if your deployment also uses Weave).
Migrate self-managed instances to W&B Operator
The following section describes how to migrate from self-managing your own W&B Server installation to using the W&B Operator to do this for you. Migrating lets the operator handle reconciliation and W&B Server upgrades automatically, so you no longer have to coordinate manifest changes or Helm upgrades for the application. The migration process depends on how you installed W&B Server:The W&B Operator is the default and recommended installation method for W&B Server. Reach out to Customer Support or your W&B team if you have any questions.
- If you used the official W&B Cloud Terraform Modules, navigate to the appropriate documentation and follow the steps there:
- If you used the W&B Non-Operator Helm chart, see Migrate to operator-based Helm chart.
- If you used the W&B Non-Operator Helm chart with Terraform, see Migrate to operator-based Terraform Helm chart.
- If you created the Kubernetes resources with manifests, see Migrate to operator-based Helm chart.
Migrate to operator-based AWS Terraform modules
For a detailed description of the migration process, see the operator-wandb chart documentation.Migrate to operator-based Google Cloud Terraform modules
Reach out to Customer Support or your W&B team if you have any questions or need assistance.Migrate to operator-based Azure Terraform modules
Reach out to Customer Support or your W&B team if you have any questions or need assistance.Migrate to operator-based Helm chart
Follow these steps to migrate to the operator-based Helm chart:-
Get the current W&B configuration. If you deployed W&B with a non-operator-based version of the Helm chart, export the values like this:
If you deployed W&B with Kubernetes manifests, export the values like this:You now have all the configuration values you need for the next step.
-
Create a file called
operator.yaml. Follow the format described in the Configuration Reference. Use the values from step 1. -
Scale the current deployment to 0 pods. This step stops the current deployment.
-
Update the Helm chart repo:
-
Install the new Helm chart:
-
Configure the new Helm chart and trigger W&B application deployment. Apply the new configuration.
The deployment takes a few minutes to complete.
- Verify the installation. Make sure that everything works by following the steps in Verify the installation.
- Remove the old installation. Uninstall the old Helm chart or delete the resources that you created with manifests.
Migrate to operator-based Terraform Helm chart
Follow these steps to migrate to the operator-based Helm chart:- Prepare Terraform config. Replace the Terraform code from the old deployment in your Terraform config with the code described in Deploy W&B with Helm Terraform module. Set the same variables as before. Do not change the
.tfvarsfile if you have one. - Execute Terraform run. Execute
terraform init,terraform plan, andterraform apply. - Verify the installation. Make sure that everything works by following the steps in Verify the installation.
- Remove the old installation. Uninstall the old Helm chart or delete the resources that you created with manifests.
Configuration reference for W&B Server
This section is a reference for the configuration options that you set in yourWeightsAndBiases custom resource. Use it to look up the YAML schema for a specific subsystem (for example, MySQL, Redis, ingress, or OIDC) as you build or update your operator.yaml file.
This section describes the configuration options for W&B Server application. The application receives its configuration as custom resource definition named WeightsAndBiases. Some configuration options are exposed with the following configuration. You must set others as environment variables.
The documentation has two lists of environment variables: basic and advanced. Only use environment variables if the configuration option that you need is not exposed using the Helm chart.
Basic example
This example defines the minimum set of values required for W&B. For a more realistic production example, see Complete example. This YAML file defines the desired state of your W&B deployment, including the version, environment variables, external resources like databases, and other necessary settings.Complete example
This example configuration deploys W&B to Google Cloud Anthos using Google Cloud Storage:Host
Object storage (bucket)
AWSkmsKey must be null.
To reference accessKey and secretKey from a secret:
MySQL
password from a secret:
License
license from a secret:
Ingress
See How to identify the Kubernetes ingress class. Without TLSCustom Kubernetes service accounts
Specify custom Kubernetes service accounts to run the W&B pods. The following snippet creates a service account as part of the deployment with the specified name:create: false:
External Redis
password from a secret:
LDAP
Configure LDAP by setting environment variables inglobal.extraEnv:
OIDC SSO
authMethod is optional.
SMTP
Environment variables
Set rate limits
For Dedicated Cloud and Self-Managed deployments that use the Operator, optionally configure rate limits by setting environment variables inspec.values.global.extraEnv. For reference, this example explicitly sets each rate limit to its default. In practice, define a rate limit only to override the default.
| Environment variable | Default | Description |
|---|---|---|
GORILLA_DEFAULT_RATE_LIMITS_FILESTREAM | 5 | Default filestream requests. |
GORILLA_DEFAULT_RATE_LIMITS_FILESTREAM_COUNT | 5 | Filestream requests per second. |
GORILLA_DEFAULT_RATE_LIMITS_FILESTREAM_PER_RUN_COUNT | 0.8 | Filestream requests per run per second. |
GORILLA_DEFAULT_RATE_LIMITS_FILESTREAM_SIZE | 10 | Filestream ingestion limit in MB per second. |
GORILLA_DEFAULT_RATE_LIMITS_RUN_UPDATE_COUNT | 10 | Run metadata update requests per second. |
Custom certificate authority
customCACerts is a list and can take many certificates. Certificate authorities specified in customCACerts only apply to the W&B Server application.
If using a ConfigMap, each key in the ConfigMap must end with
.crt (for example, my-cert.crt or ca-cert1.crt). This naming convention is required for update-ca-certificates to parse and add each certificate to the system CA store.Custom security context
Each W&B component supports custom security context configurations of the following form:The only valid value for
runAsGroup: is 0. Any other value is an error.app to your configuration:
console, weave, weave-trace, and parquet.
Configuration reference for W&B Operator
This section describes configuration options for W&B Kubernetes Operator (wandb-controller-manager). The operator receives its configuration in the form of a YAML file.
By default, the W&B Kubernetes Operator doesn’t need a configuration file. Create a configuration file if required. For example, you might need a configuration file to specify custom certificate authorities, deploy in an air gap environment, and so forth.
Find the full list of spec customization in the Helm repository.
Custom CA
A custom certificate authority (customCACerts) is a list and can take many certificates. Those certificate authorities, when added, only apply to the W&B Kubernetes Operator (wandb-controller-manager).
Each key in the ConfigMap must end with
.crt (for example, my-cert.crt or ca-cert1.crt). This naming convention is required for update-ca-certificates to parse and add each certificate to the system CA store.FAQ
Purpose and role of each pod
A W&B Server deployment includes the following pods:wandb-app: the core of W&B, including the GraphQL API and frontend application. It powers most of the W&B platform’s functionality.wandb-console: the administration console, accessed through/console.wandb-otel: the OpenTelemetry agent, which collects metrics and logs from resources at the Kubernetes layer for display in the administration console.wandb-prometheus: the Prometheus server, which captures metrics from various components for display in the administration console.wandb-parquet: a backend microservice separate from thewandb-apppod that exports database data to object storage in Parquet format.wandb-weave: another backend microservice that loads query tables in the UI and supports various core app features.wandb-weave-trace: a framework for tracking, experimenting with, evaluating, deploying, and improving LLM-based applications. The framework is accessed through thewandb-apppod.
How to get the W&B Operator Console password
See Access the W&B management console.How to access the W&B Operator Console if Ingress doesn’t work
Execute the following command on a host that can reach the Kubernetes cluster:https://localhost:8082/ console.
For how to get the password (Option 2), see Access the W&B management console.